In this guide, I will walk you through easy, eye-catching designs that will transform your outdoor space. A basic garden fence is a simple and cost-effective way to add style, security, and privacy to your backyard. Whether you have a small garden or a large one, a basic garden fence can enhance the overall look and feel of your outdoor area. Let’s dive into the world of basic garden fence designs and discover how you can master the basics to create a beautiful and functional fence for your garden.
Key Takeaways:
- A basic garden fence is an affordable and DIY-friendly way to upgrade your backyard.
- Understanding the key elements of a basic garden fence, such as posts, rails, and fencing boards, is essential for successful design.
- Choosing the right design and considering zoning codes ensures compliance and harmonizes with your surroundings.
- Proper planning and measuring of the site are crucial for determining post spacing and optimizing material usage.
- Building on slopes and addressing utility lines require careful consideration to ensure the stability and safety of your fence.
- Selecting the right materials, such as construction-heart redwood or cedar, ensures durability and longevity.
- Preparing the site and setting the posts securely are crucial steps in the installation process.
- Attaching rails and installing fencing boards complete the construction of your basic garden fence.
- Adding decorative details can enhance the visual appeal of your basic garden fence.
- Maintaining and preserving your basic garden fence is essential for its longevity and appearance.
To build a basic garden fence, it’s important to understand the essential elements that make up its design.
A basic garden fence consists of several key components that work together to create a functional and visually appealing structure. These elements include:
- Posts: These are the vertical supports that are sunk into the ground and provide stability for the fence.
- Rails: The rails are horizontal bars that connect the posts, running along the top, bottom, and sometimes in the middle of the fence.
- Fencing boards or panels: These are the individual boards or panels that are attached to the rails, giving the fence its characteristic appearance.
Understanding these elements is crucial because they form the foundation of any basic garden fence design. By mastering these basics, you’ll be able to create a fence that not only serves its purpose but also enhances the overall aesthetics of your outdoor space.
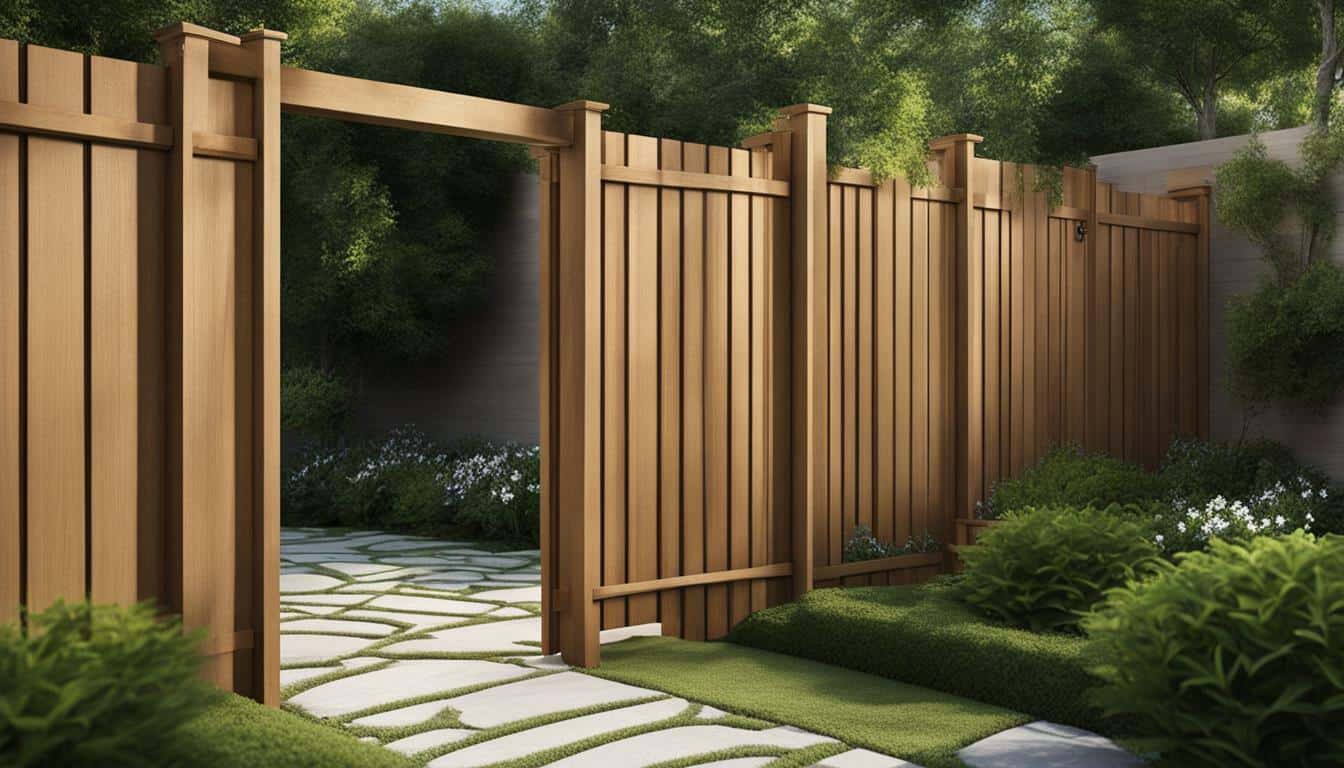
Designs vary widely, but just about all fences consist of the same basic elements: A series of posts sunk into the ground and connected by rails on the top, bottom, and usually in the middle as well; and fencing boards or panels that are nailed to the rails to give the fence its character. Privacy fences usually require 4×4 posts. Rail and fencing lumber can be almost any size. Lumber yards sell prefab sections of fence in many styles, but custom design and construction usually yield a better-looking fence.
Choosing the Right Design and Considering Zoning Codes
Before proceeding with your fence project, it’s crucial to choose a design that suits your preferences and also adhere to any building regulations in your area. By selecting the right design for your basic garden fence, you can ensure that it not only enhances the aesthetic appeal of your outdoor space but also meets any requirements set forth by local building and zoning codes.
When it comes to choosing a design for your basic garden fence, consider factors such as the style of your home and landscape, the level of privacy you desire, and any specific features or decorative elements you want to incorporate. There are various options available, ranging from traditional picket fences to modern horizontal slat designs. Take the time to explore different garden fence ideas and find inspiration for your own unique design.
Once you have a design in mind, it’s important to check with your local building and zoning authorities to ensure that your chosen design complies with any regulations or restrictions in your area. These regulations may dictate the maximum fence height allowed, the distance you can build from property lines or streets, and even the materials you can use. It’s essential to familiarize yourself with these rules to avoid any potential legal or financial issues down the line.
Additionally, you may need to obtain a permit before you can proceed with the installation of your basic garden fence. Check with your local building department to determine if a permit is required and what the application process entails. It’s always better to be proactive and obtain the necessary permits and approvals before starting your project to ensure a smooth and hassle-free installation process.
Choosing the Right Design and Considering Zoning Codes – Checklist:
- Consider the style of your home and landscape
- Think about the level of privacy you desire
- Explore different garden fence ideas for inspiration
- Check local building and zoning regulations
- Verify maximum fence height and distance restrictions
- Determine if a permit is required
- Obtain necessary permits and approvals
By carefully selecting a design that suits your needs and complying with zoning codes, you can ensure that your basic garden fence not only enhances the beauty of your outdoor space but also meets all necessary requirements.
Section 4: Planning and Measuring the Site
Proper planning and accurate measurements are essential for a successful garden fence installation. By taking the time to carefully plan and measure your site, you can ensure that your fence will be properly positioned and built to your desired specifications. Here are the steps to follow:
- Start by staking out the perimeter of your garden area. Use stakes and strings or a mason line to create a clear boundary.
- Check and double-check your measurements to ensure accuracy. This will help you determine the number of fence posts you will need and the spacing between them. It’s important to remember that the distance between posts should not exceed eight feet.
- Consider the slope of your site. If you have a sloping area, you may need to step your fence, setting each section lower than the one preceding it. This will ensure that your fence follows the natural contour of the land and remains level.
- Contact your local utility companies before you start digging any holes. It’s important to know the location of any underground lines to avoid interference or damage during the installation process.
Once you have completed these initial steps, you will have a clear plan for your garden fence installation. This will make the construction process smoother and more efficient, ultimately resulting in a fence that meets your needs and enhances the beauty of your outdoor space.
Table 1: Fence Post Spacing Guidelines
| Height of Fence | Recommended Post Spacing |
|---|---|
| 4 feet | 6-8 feet |
| 6 feet | 6-8 feet |
| 8 feet | 6-8 feet |
“Proper planning and accurate measurements are essential for a successful garden fence installation.”
Before you begin digging any holes for your fence posts, it’s important to check with your local utility companies to ensure that there are no underground lines in the area. This will help you avoid any accidents or damage to essential utility lines. It’s always better to be safe than sorry.
Once you have received clearance from the utility companies, you can proceed with digging the holes for your fence posts. Use a post hole digger to create holes that are deep enough to bury about a third of the post underground. This will provide the necessary stability for your fence.
After digging the holes, ensure that they are level and evenly spaced according to your measurements. You can use a post level and a tape measure to ensure accuracy. Once the holes are ready, you can begin the process of setting the posts in place.
Be sure to fill each hole with concrete to secure the posts firmly in place. This will provide additional stability and ensure that your fence stands strong for years to come. While the concrete is drying, check each post for plumb by holding a level to two adjacent faces. This will ensure that your fence is level and straight.
After the concrete has cured, you can trim the posts to a uniform height if necessary. It’s also a good idea to shape the tops of the posts to allow for water drainage. This will help prevent water from collecting on top of the posts and causing damage over time.
With the posts securely in place, you are now ready to move on to the next step in the construction process: attaching the rails and installing the fencing boards. This will complete the structure of your garden fence and bring you one step closer to enjoying the benefits of a well-designed and properly installed fence.

By following these steps and taking the time to plan and measure your site accurately, you can ensure a successful garden fence installation. Remember to always prioritize safety and check local regulations and guidelines before starting any construction project. With proper planning and attention to detail, you can create a beautiful and functional garden fence that adds value and enhances the aesthetics of your outdoor space.
Building on Slopes and Dealing with Utility Lines
If your yard has slopes or is located near utility lines, there are additional considerations to keep in mind when installing a basic garden fence. Follow these tips to ensure a smooth installation process:
Building on Slopes
When building a basic garden fence on slopes, it’s important to plan for the change in elevation. Here’s what you need to do:
- Start by measuring the slope of your yard. Use a level or laser level to determine the angle of the slope.
- If the slope is steep, consider stepping the fence design. This means installing the fence in sections that gradually step down the slope.
- Determine the optimal post spacing for the slope. Posts should be spaced closer together on steeper slopes to ensure stability.
- Make sure to level each section of the fence as you go. Use a level or laser level to ensure that the posts are plumb and the rails are level.
- Fill in any gaps or spaces under the fence caused by the slope. This will help keep small animals from getting in or out of your garden area.
Dealing with Utility Lines
Before you start digging any holes for your garden fence, it’s crucial to contact your local utility companies to have them mark any underground lines. Here’s what you should do:
- Call your local “Call Before You Dig” number to schedule a utility locator to come out and mark any underground lines.
- Wait for the locator to mark the lines before you start digging. This will help you avoid any potential damage to utility lines and ensure your safety.
- Plan your fence layout accordingly, keeping a safe distance from any marked utility lines.
- If you’re unsure about the location of utility lines, it’s best to consult a professional before proceeding with the fence installation.
If you follow these guidelines for building on slopes and dealing with utility lines, you can successfully install a basic garden fence that meets your needs and enhances the beauty of your outdoor space.

Remember to always prioritize safety and compliance with local regulations when installing your garden fence.
Selecting the Right Materials for Your Basic Garden Fence
The materials you choose for your basic garden fence play a crucial role in its longevity and overall appearance. Here’s what you need to know:
The hardest part of building your own fence is digging the holes; after that, the structure takes shape quickly. Besides a rented posthole digger, you’ll need only a circular saw and ordinary carpentry tools.
Designs vary widely, but just about all fences consist of the same basic elements: A series of posts sunk into the ground and connected by rails on the top, bottom, and usually in the middle as well; and fencing boards or panels that are nailed to the rails to give the fence its character. Privacy fences usually require 4×4 posts. Rail and fencing lumber can be almost any size. Lumber yards sell prefab sections of fence in many styles, but custom design and construction usually yield a better-looking fence.
Before proceeding, check community building and zoning codes. Many specify maximum fence height, distances you can build from property lines and the street, and even the materials you can and can’t use. Once you’ve chosen a design and established a location, stake out and measure the site. Plot post spacing for the most efficient use of lumber. Six- or seven-foot spans usually work well; never set privacy-fence posts more than 8 feet apart. If you’re building your fence on a slope, plan to step the fence down the hill, setting each section lower than the one preceding it. Only if the slope is slight—and the fence design won’t suffer—should you follow the contour.
Editor’s Tip: Always call your local utility companies before you start a project that requires digging in your yard. Have all lines clearly marked before you finalize your plan to make sure your project doesn’t interfere with underground lines.
When you order lumber, specify construction-heart redwood or cedar or ground-contact, pressure-treated wood for all posts and bottom rails; upper rails and fencing can be less expensive grades of rot-resistant lumber. To minimize rust, buy hot-dip galvanized nails and fittings. If you want to paint or stain your fence, apply the finish to posts, rails, and fencing before you nail up the fencing. Besides saving time, you’ll get better coverage.

Lay out the site, dig holes, and set posts, starting with the end posts. Check each post for plumb by holding a level to two adjacent faces; nail braces to hold posts upright. Check, too, that posts are aligned by tying string from end post to end post.
As you shovel concrete into the holes, have a helper tamp the concrete to remove bubbles. Round off the concrete so water will drain away from the posts. After the concrete cures, cut posts to a uniform height, if necessary. Shape tops of posts so they’ll shed water.
Attach the rails to the posts. We installed our rails face up and added extra support with a right angle piece of wood, but you can also use galvanized rail clips to speed up this process. A line level and combination square assure that each rail is level and square with the posts.
Measure carefully and use a square to mark locations on the rails for each fencing board. Wood scraps squeezed between boards maintain uniform spacing. Have a helper align boards—in this case flush with the bottom—while you secure them to the rails.
Turn your fence into a living fence with these tips.
Was this page helpful?
- Yes
- No
Tell us why!
Preparing the Site and Setting the Posts
Properly preparing the site and setting the posts is a crucial step in building a sturdy and long-lasting basic garden fence. Follow these step-by-step instructions to ensure the success of your fence installation project.
- Start by marking the boundaries of your fence and clear any obstacles such as vegetation or debris from the site. This will give you a clear area to work with.
- Using stakes and strings or a mason line, outline the perimeter of your fence. Make sure the lines are straight and level, and use a measuring tape to ensure accuracy.
- Once your perimeter is marked, it’s time to dig the post holes. Use a post hole digger to create holes that are deep enough to bury about a third of the post underground. The hole should be wide enough to allow for the concrete that will secure the posts in place.
- As you dig the holes, make sure they are evenly spaced and aligned according to your planned fence design. Use a level and a plumb line to check the vertical alignment of each hole.
Editor’s Tip: Always call your local utility companies before you start digging to avoid interfering with any underground lines.
Now that your post holes are dug, it’s time to set the posts. Here’s how:
- Place a few inches of gravel in the bottom of each hole. This will help with stability and drainage.
- Position the posts in the holes, making sure they are level and aligned according to your fence design. Use a level to check the vertical alignment and adjust as needed.
- Pour concrete into the holes, filling them up about two-thirds of the way. Add water on top of the dry concrete mix and stir until well blended. Make sure the posts are still level and aligned before the concrete sets.
- Brace the posts with stakes to keep them in place while the concrete cures. This will prevent any movement or shifting during the drying process.
- Allow the concrete to cure according to the manufacturer’s instructions. This usually takes about 24 to 48 hours.
Congratulations! You have successfully prepared the site and set the posts for your basic garden fence. The next step is to attach the rails and install the fencing boards to complete the construction of your fence.

“Properly preparing the site and setting the posts is a crucial step in building a sturdy and long-lasting basic garden fence.”
Section 8: Attaching Rails and Installing Fencing Boards
Once the posts are set, it’s time to attach the rails and install the fencing boards to create a finished look for your basic garden fence. This step-by-step guide will walk you through the process:
- 1. Prepare your tools and materials: Before you begin, gather all the necessary tools and materials for attaching the rails and installing the fencing boards. You will need a hammer or nail gun, nails or screws, a level, a measuring tape, and wood scraps for spacing between boards.
- 2. Attach the rails to the posts: Start by positioning the first rail at the top of the posts. Use a level to ensure it is horizontally level. Secure the rail to the post using nails or screws. Repeat this step for the bottom rail, ensuring it is parallel to the top rail. If desired, you can add additional rails in the middle for added support.
- 3. Mark the locations for the fencing boards: Measure and mark the desired spacing between each fencing board on the rails. Use a square to ensure the marks are straight and evenly spaced.
- 4. Install the fencing boards: Starting at one end of the fence, align the first fencing board with the marked locations on the rails. Use wood scraps as spacers between boards to maintain uniform spacing. Have a helper hold the board in place while you secure it to the rails using nails or screws. Continue this process for each fencing board until the entire fence is covered.
- 5. Check for level and alignment: Periodically check the level and alignment of the fence as you install the fencing boards. Make any necessary adjustments to ensure the fence is straight and properly aligned.
- 6. Trim or shape the top of the posts: Once all the fencing boards are installed, you may need to trim or shape the top of the posts to create a finished look. Use a saw or other cutting tool to carefully shape the tops of the posts, ensuring they shed water away from the fence.

As you can see, attaching the rails and installing the fencing boards is a straightforward process that can be accomplished with basic tools and materials. It’s important to take your time and ensure that each step is done accurately to achieve a sturdy and visually appealing basic garden fence.
Elevate the look of your basic garden fence with decorative details
Elevate the look of your basic garden fence by incorporating decorative details that reflect your personal style. Adding these decorative elements can enhance the visual appeal of your fence and make it stand out in your outdoor space. Here are some ideas and inspiration to help you transform your basic garden fence into a beautiful and eye-catching feature:
1. Paint or Stain
One of the easiest ways to add decorative flair to your garden fence is by painting or staining it in a color that complements your outdoor aesthetic. Consider using bold and vibrant colors for a statement fence or opt for natural wood stains to enhance the beauty of the wood grain. A fresh coat of paint or stain can instantly transform the look of your fence and make it more visually appealing.
2. Decorative Panels
Add interest and charm to your basic garden fence by incorporating decorative panels. These can be made from various materials such as wrought iron, wood, or PVC, and can feature intricate patterns, designs, or motifs. Install these decorative panels between the fence posts or on top of the existing fence panels to create a unique and personalized look for your garden fence.
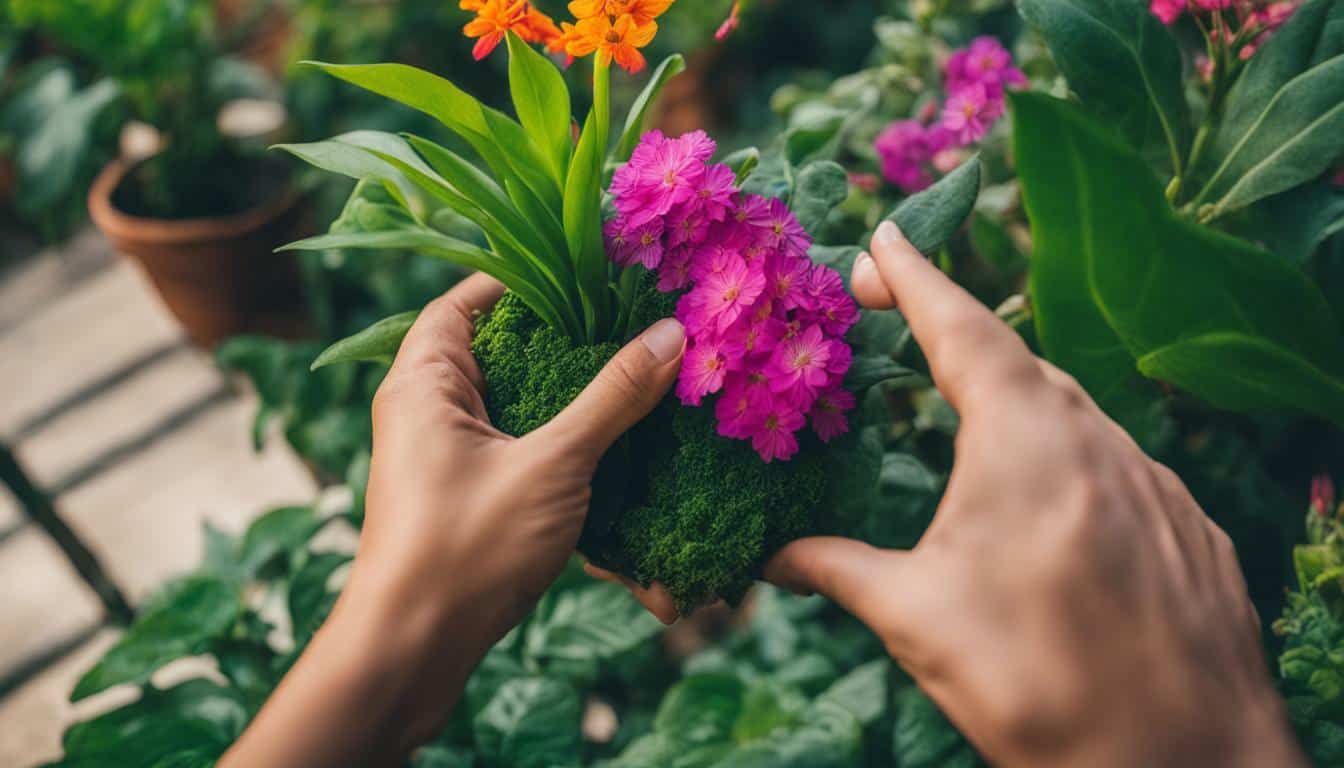
3. Climbing Plants
Take advantage of the vertical space offered by your garden fence by planting climbing plants. These plants can add a beautiful and natural touch to your fence, creating a lush and green backdrop. Choose climbing plants that suit your climate and aesthetic preferences, such as ivy, roses, wisteria, or clematis. Install trellises or wire supports along the fence to help the plants climb and spread.
4. Potted Plants and Hanging Baskets
Create a charming and colorful display by incorporating potted plants and hanging baskets along your garden fence. Choose a variety of flowers and foliage that complement the overall design of your outdoor space. Hang the baskets at different heights and stagger the placement of potted plants to add depth and visual interest. This will not only enhance the look of your fence but also bring life and vibrancy to your garden.
5. Decorative Accents
Add small decorative accents to your garden fence to inject personality and charm. This can include decorative hooks for hanging lanterns or bird feeders, colorful wind chimes, or even small sculptures or plaques. Choose accents that resonate with your style and create a cohesive and visually appealing look.
By incorporating these decorative details, you can transform your basic garden fence into a stunning and unique feature in your outdoor space. Let your creativity shine and make your garden fence a reflection of your personal style and taste.

Maintaining and Preserving Your Basic Garden Fence
Regular maintenance and proper preservation techniques are essential for keeping your basic garden fence in optimal condition. Taking care of your fence will not only prolong its lifespan but also help maintain its appearance. Here are some tips to help you maintain and preserve your basic garden fence:
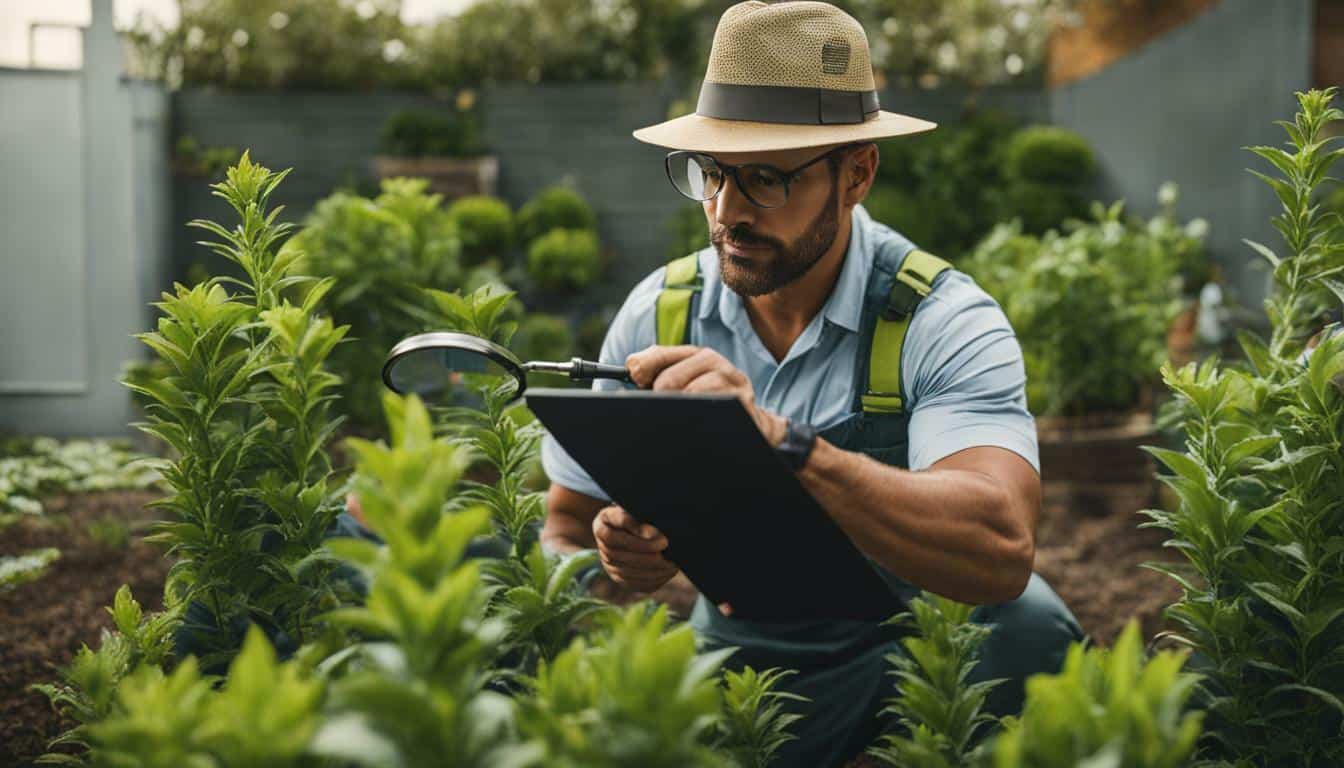
1. Inspect Your Fence Regularly
Take the time to inspect your fence regularly for any signs of damage or wear. Look for loose boards, broken posts, or rusted fittings. Addressing these issues early on can prevent further damage and ensure the stability of your fence.
2. Clean Your Fence
Remove any dirt, debris, or moss that may accumulate on your fence. For wooden fences, use a mild soap and water solution to gently scrub away any grime. Avoid using harsh chemicals or power washers, as they can damage the wood. Rinse the fence thoroughly and allow it to dry completely before proceeding with any other maintenance tasks.
3. Treat and Seal Your Wood Fence
If your basic garden fence is made of wood, treating and sealing the wood is crucial for its longevity. Apply a wood preservative or stain to protect the wood from moisture, sun damage, and pests. Follow the manufacturer’s instructions for application and reapplication intervals. Sealing the wood will also enhance its appearance and prevent it from graying over time.
4. Repair or Replace Damaged Components
If you notice any damaged or deteriorated components of your fence, such as broken boards or posts, repair or replace them promptly. Secure loose boards or rails, and replace any irreparable parts. This will help maintain the integrity and stability of your fence.
5. Trim Vegetation Around Your Fence
Regularly trim any vegetation, such as shrubs or tree branches, that may come into contact with your fence. Overgrown plants can cause damage by exerting pressure on the fence or by trapping moisture against the wood, leading to rot or decay. Keeping vegetation trimmed will also enhance the aesthetics of your fence.
6. Protect Against Pests
Inspect your fence for signs of pest infestation, such as termites or carpenter ants. If you notice any activity, consult a pest control professional to address the issue. Taking preventative measures, such as applying pest-resistant treatments to the wood and keeping the surrounding area free from debris, can help protect your fence from pests.
7. Winterize Your Fence
Before winter arrives, take steps to protect your fence from the harsh weather conditions. Clear away leaves or debris that may accumulate at the base of your fence, as they can trap moisture and promote rot. Apply a water-repellent coating or cover the fence with a tarp to shield it from snow and ice. Consider reinforcing weak or vulnerable areas, such as gate hinges or latch mechanisms, to withstand the added strain of winter weather.

Regular maintenance and proper preservation will ensure that your basic garden fence remains an attractive and functional addition to your outdoor space for years to come. By following these tips, you can protect your investment and enjoy the benefits of a well-maintained fence.
Building a Basic Garden Fence for Privacy and Security
Building a basic garden fence not only enhances your outdoor space but also provides privacy and security. Follow these steps to create a beautiful and functional addition to your backyard.
Understanding the Elements of a Basic Garden Fence
When building a basic garden fence, it’s important to understand the key components. These include posts, rails, and fencing boards or panels. Posts are sunk into the ground and connected by rails on the top, bottom, and usually in the middle. Fencing boards or panels are then attached to the rails, giving the fence its character.
Choosing the Right Design and Considering Zoning Codes
Before embarking on your garden fence project, it’s crucial to choose a suitable design that complements your outdoor space. Additionally, it’s important to check your local building and zoning codes to ensure compliance with height restrictions, setback requirements, and material regulations.
Planning and Measuring the Site
Proper planning and measurement are essential for a successful garden fence installation. Start by staking out and measuring the site to determine the optimal post spacing. This will ensure efficient use of materials and a sturdy fence structure. Consider the slope of your yard and plan accordingly, stepping the fence down the hill when necessary.
Building on Slopes and Dealing with Utility Lines
If your yard has slopes, it’s important to plan how to build the fence on uneven terrain. Follow the contour of the slope and adjust the height of each section accordingly. Additionally, contact your local utility companies before digging to avoid interference with underground lines.
Selecting the Right Materials for Your Basic Garden Fence
Choosing the right materials is crucial for the longevity and appearance of your garden fence. Opt for durable options such as construction-heart redwood or cedar for posts and bottom rails. For upper rails and fencing boards, less expensive grades of rot-resistant lumber can be used. To minimize rust, opt for hot-dip galvanized nails and fittings. Consider applying a finish to the posts, rails, and fencing boards before installation for better coverage and protection against the elements.
Preparing the Site and Setting the Posts
Before setting the posts, prepare the site by removing any obstacles and ensuring the ground is level. Dig holes for the posts according to your planned spacing and secure them in place with concrete. Use a level to ensure the posts are upright, and double check alignment with string or stakes.
Attaching Rails and Installing Fencing Boards
Once the posts are set, it’s time to attach the rails and install the fencing boards or panels. Secure the rails to the posts, ensuring they are level and square. Measure carefully and mark the locations on the rails for each fencing board, maintaining uniform spacing. Attach the boards to the rails, ensuring they are flush and aligned.
Enhancing Your Basic Garden Fence with Decorative Details
Your basic garden fence can be further enhanced with decorative details to add visual appeal. Consider incorporating elements such as finials, lattice panels, or decorative post caps. These additions can transform a simple fence into a beautiful focal point in your garden.
Maintaining and Preserving Your Basic Garden Fence
To ensure the longevity and appearance of your garden fence, proper maintenance is essential. Regularly inspect the fence for any damage, such as loose boards or corroded fittings. Repair or replace as necessary. Additionally, consider applying a protective finish or stain to the fence to preserve its appearance and protect against weathering.
Conclusion
Building a basic garden fence is a rewarding project that enhances both the functionality and aesthetics of your outdoor space. By understanding the key components, selecting the right materials, and following proper installation and maintenance practices, you can create a beautiful and durable fence that offers privacy, security, and a stunning backdrop for your garden.
FAQ
Q: What are the benefits of having a basic garden fence?
A: A basic garden fence can mark your property lines, increase privacy, and help keep pets and small children inside your yard.
Q: What are the key components of a basic garden fence?
A: The key components of a basic garden fence are posts, rails, and fencing boards or panels.
Q: How do I choose the right design for my basic garden fence?
A: When choosing a design, consider the style of your house and the purpose of the fence. It’s also important to check local building and zoning codes.
Q: How do I plan and measure my site for a basic garden fence?
A: Stake out and measure the site, and plot post spacing for efficient use of materials. If building on a slope, plan to step the fence down the hill. Always call utility companies before digging to avoid underground lines.
Q: What materials should I use for my basic garden fence?
A: It is recommended to use construction-heart redwood or cedar for posts and bottom rails, and rot-resistant lumber for upper rails and fencing. Use hot-dip galvanized nails and fittings to minimize rust.
Q: How do I set the posts for my basic garden fence?
A: Dig holes for the fence posts, making sure they are deep enough to bury about a third of the post underground. Fill the holes with concrete and brace the posts until the concrete cures.
Q: How do I attach rails and fencing boards to complete my basic garden fence?
A: Attach the rails to the posts, making sure they are level and square. Measure carefully and use a square to mark locations on the rails for each fencing board. Secure the boards to the rails while ensuring uniform spacing.
Q: How can I enhance the visual appeal of my basic garden fence?
A: You can add decorative elements such as lattice panels, finials, or paint/stain to enhance the appearance of your basic garden fence.
Q: How do I maintain and preserve my basic garden fence?
A: Regular maintenance, such as cleaning, sealing, and repainting/staining, can help prolong the life and appearance of your basic garden fence.
Why is the Gardena System Basic Set a Good Upgrade for My Garden?
Looking to upgrade your garden? The Gardena System Basic Set is a great choice. This innovative system offers all the essential tools to enhance your gardening experience. With features such as easy installation, water conservation, and precise irrigation control, it revolutionizes how you care for your plants. Upgrade your garden today and enjoy a hassle-free and efficient gardening experience with the Gardena System Basic Set.

Leave a Reply